Create Stream
This page explains how to create a live stream and broadcast them to your audience using Castr API.
Create a live stream
Live stream objects can easily be created by sending a request to the Create a new Livestream endpoint.
Sample request:
curl --request POST \
     --url https://api.castr.com/v2/live_streams \
     --header 'accept: application/json' \
     --header 'authorization: {your_authentication} \
     --header 'content-type: application/json' \
     --data '
{
  "settings": {
    "abr": false,
    "cloud_recording": true

  },
  "name": "My Live Event",
  "enabled": true
}
'
The endpoint returns a Live Stream object with the ingest information: server and key for putting into your encoder. It also returns all playback URLs and additional information about the Livestream.
Sample Response:
{
  "_id": "6533014ecc9b9d23100d8206",
  "name": "My Live Event",
  "enabled": true,
  "ingest": {
    "server": "rtmp://live.castr.io/static",
    "key": "live_5657fxxxxxx56f25bc538675f8?password=b3xxx20"
  },
  "playback": {
    "embed_url": "https://player.castr.com/live_5657fxxxxxx56f25bc538675f8",
    "hls_url": null
  },
  "platforms": [],
  "settings": {
    "abr": false,
    "cloud_recording": false
  },
  "user": "5b2e1c65f1e043163435d4e9",
  "creation_time": "2023-10-20T22:38:06.639Z"
}
Start broadcasting
Castr uses the Real-Time Messaging Protocol (RTMP) as a communication protocol for live streaming the data over the Internet. You can use both software and hardware encoders to broadcast the Livestream.
To broadcast a live stream, you must pass the ingest.server URL and the ingest.key value returned by the Create Live Stream URL to your encoding device and stream live video data to it.
  "ingest": {
    "server": "rtmp://live.castr.io/static",
    "key": "live_5657fxxxxxx56f25bc538675f8?password=b3xxx20"
  }
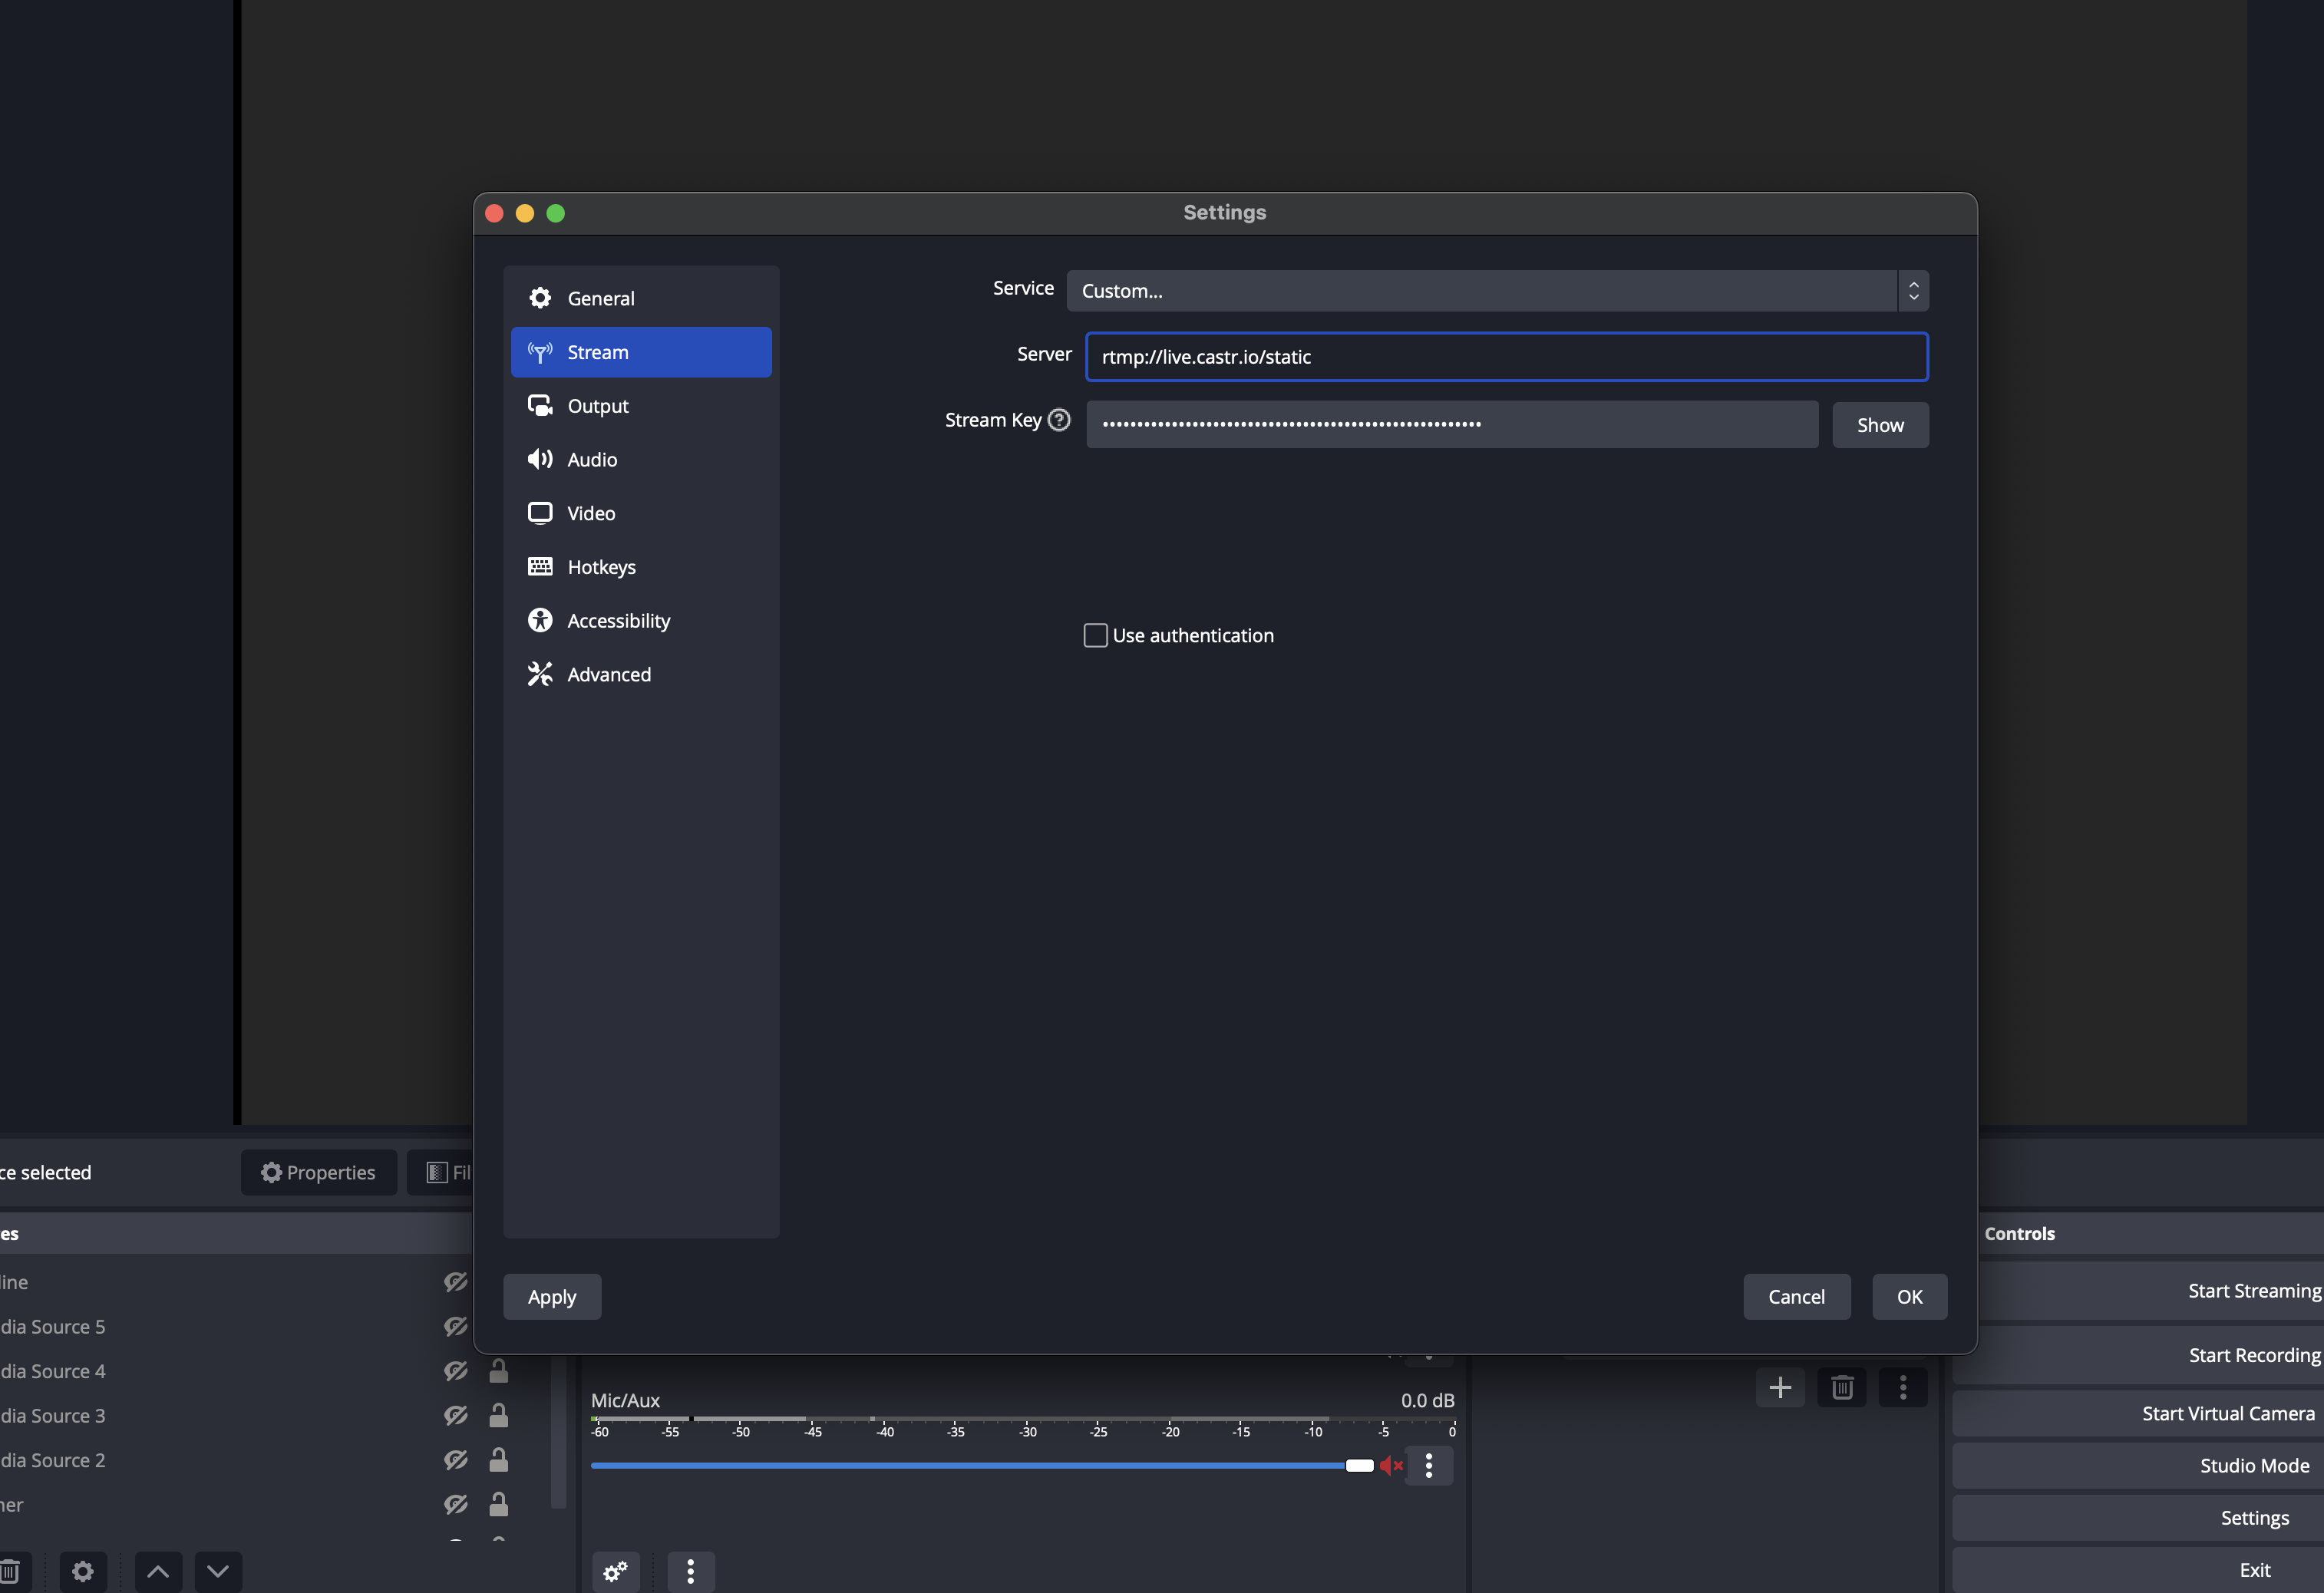
In our example here, we will demonstrate broadcasting the live video using the Open Broadcaster Software (OBS):

Adding server and stream key to OBS.
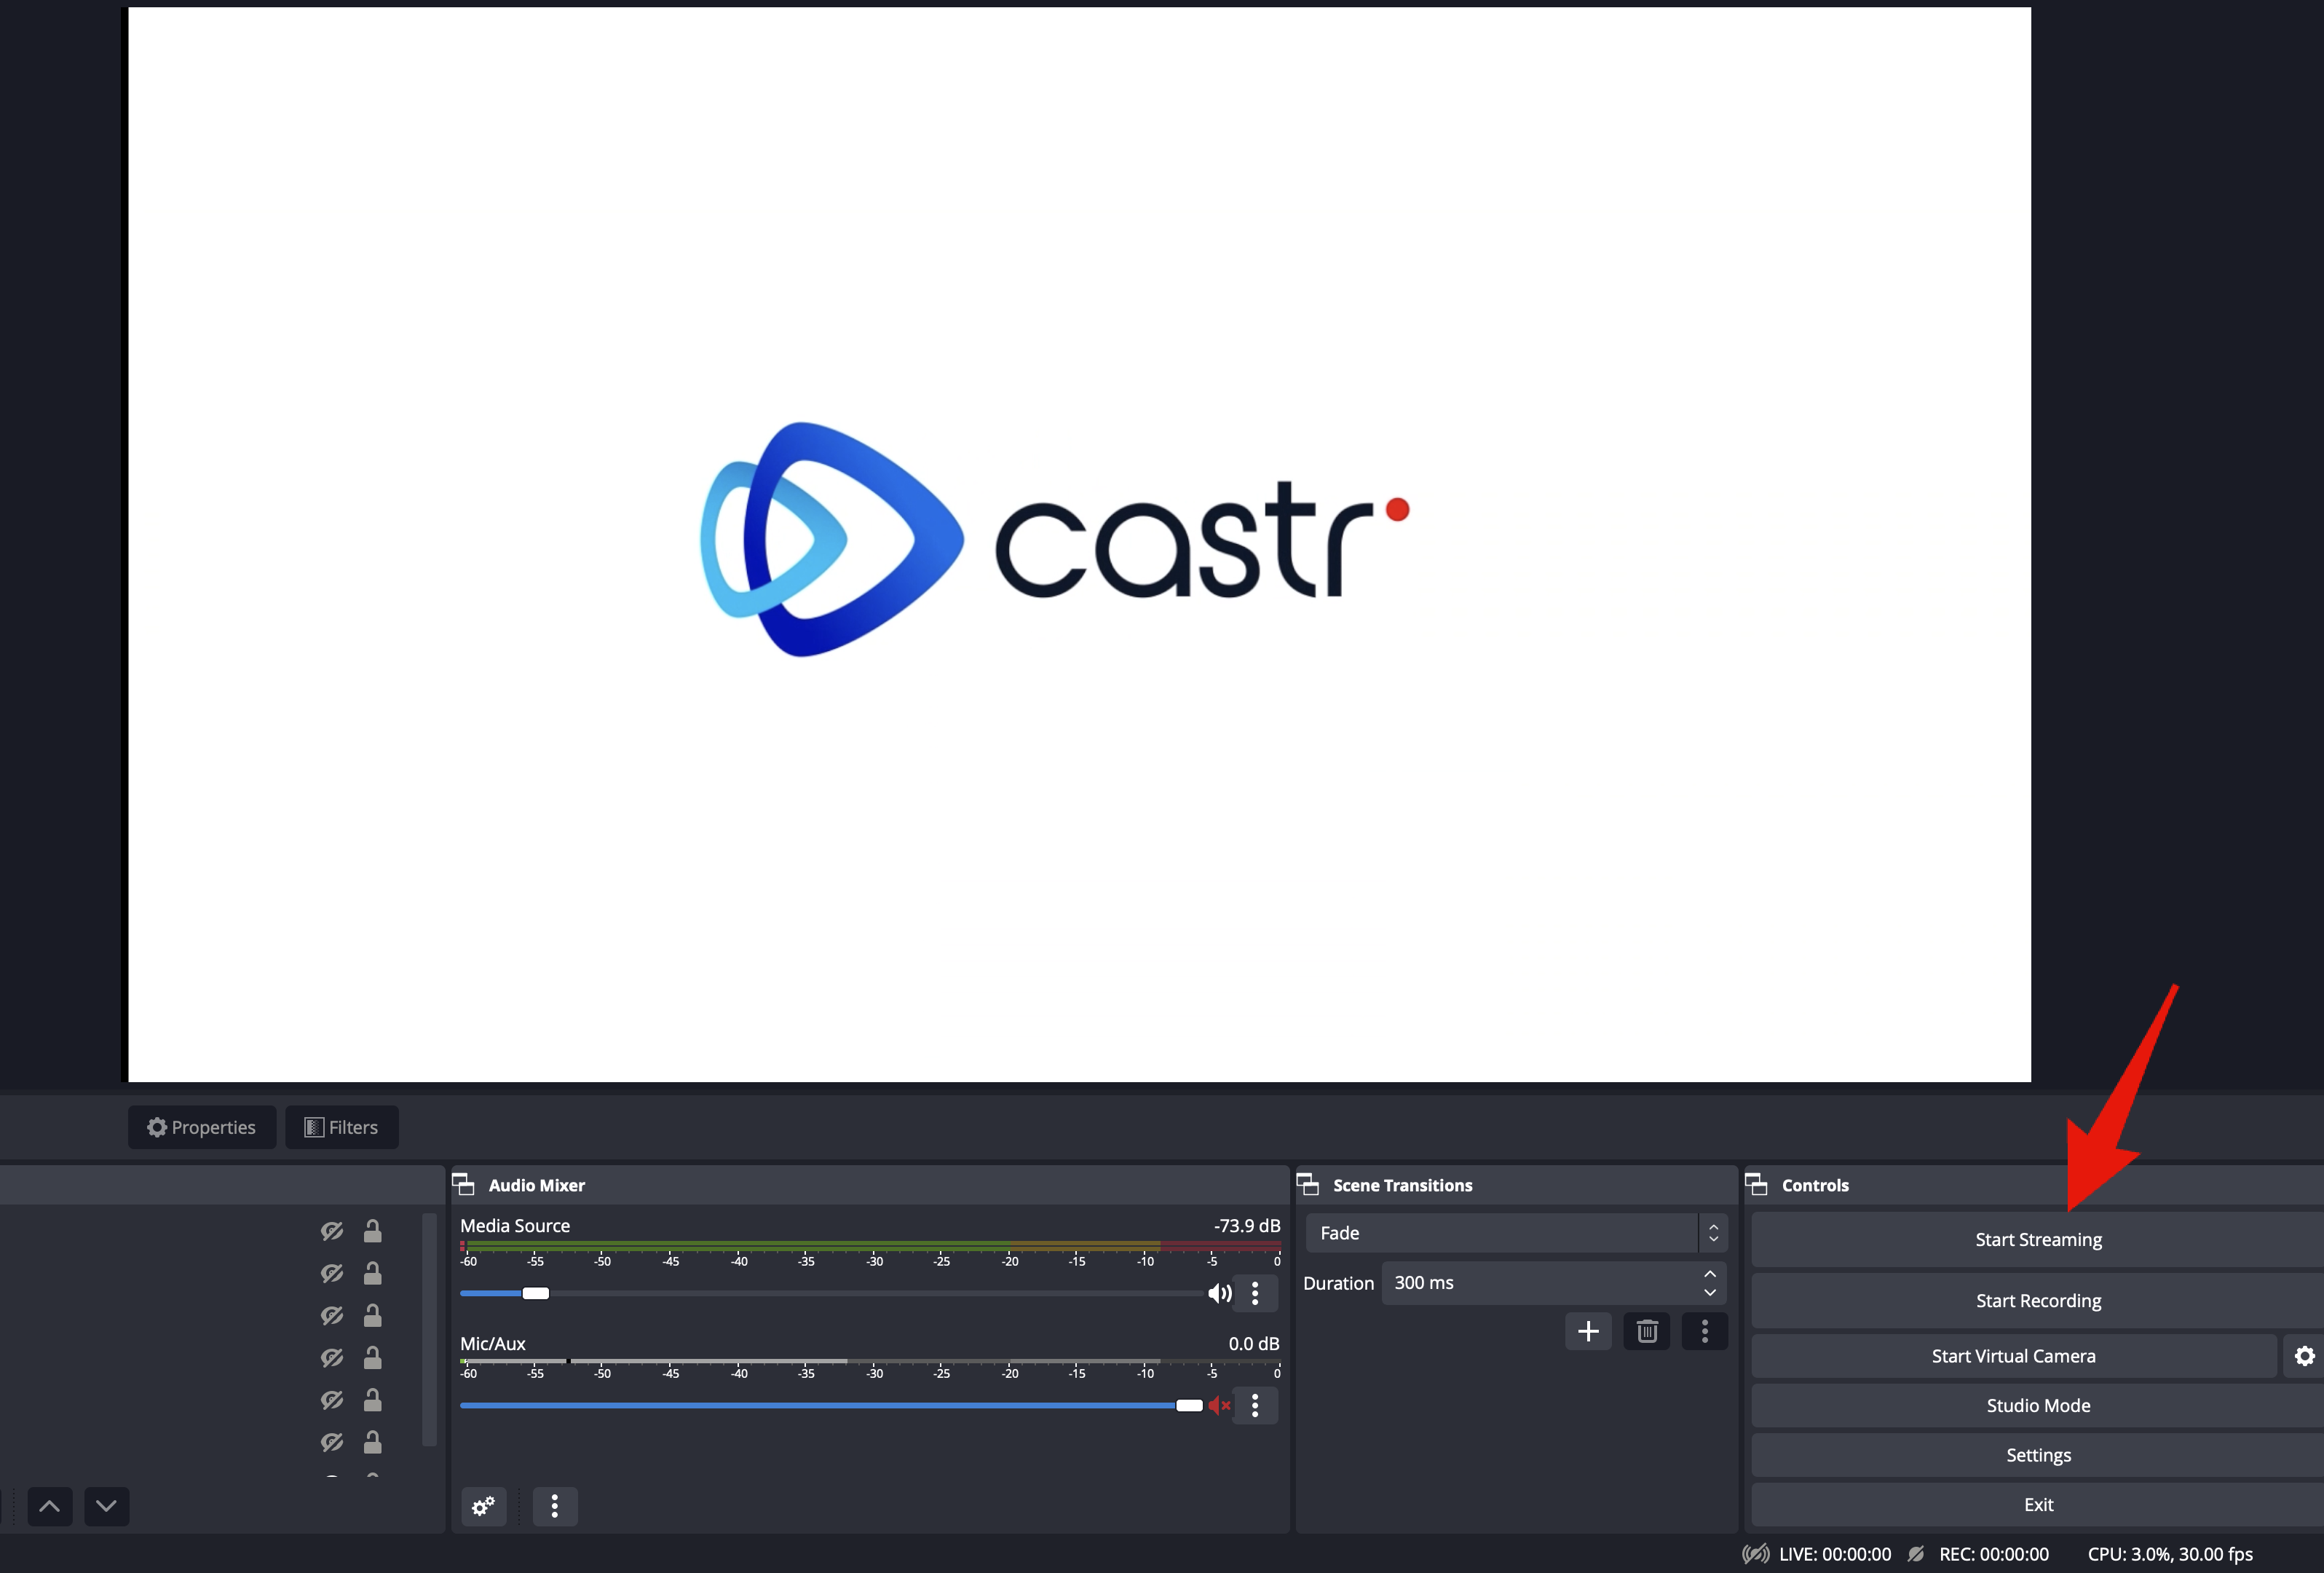
Once the Server and Stream Key are added, you are ready to go live, make sure you have selected stream sources in your OBS and click Start Streaming to start sending data to LiveAPI.

Check stream source and Start streaming.
Then, you can watch your stream in action using one of the playback options in the response.
- For
embed_urlandembed_audio_url, you can open them directly with any browser. - For
hls_url, you can open them via VLC (Open network stream option) or use any HLS player online such as Castr HLS player.
"playback": {
        "embed_url": "https://player.castr.com/lv_16833a90987411ecb1de8570eafe89432",
        "embed_audio_url": "https://player.castr.com/lv_16833a90987411ecb1de8570eafe89432?onlyAudio=true",
        "hls_url": "https://stream.castr.com/620e0ba1ce8f11ddde571d1c/lv_16833a90987411ecb1de8570eafe89432/index.m3u8"
    }
Stop Broadcasting
Once you are done with the live streaming, you can stop the encoder, and the stream will be automatically disconnected from the LiveAPI server.
For emergency stop, you can call the Update Livestream endpoint and set the enabled parameter to false then the stream will stop receiving stream data from the encoder immediately.
Setting Security Options Via API
You can control the player security settings using the API by passing the security settings under the settings parameter.
Example
curl --request POST \
     --url https://api.castr.com/v2/live_streams \
     --header 'accept: application/json' \
     --header 'authorization: {your_authentication}' \
     --header 'content-type: application/json' \
     --data '{
       "settings": {
         "abr": false,
         "cloud_recording": true,
         "embed_password": "",
         "country_block": [],
         "country_whitelist": [],
         "domain_whitelist": [],
         "chat_enabled": true
       },
       "name": "My Live Event",
       "enabled": true
     }'
Detailed Example
curl --location 'https://api.castr.com/v2/live_streams' \
     --header 'accept: application/json' \
     --header 'authorization: {your_authentication}' \
     --header 'content-type: application/json' \
     --data '{
       "name": "July event",
       "enabled": false,
       "settings": {
         "abr": false,
         "cloud_recording": true,
         "embed_password": "abcd1234",
         "country_block": ["ad", "dz", "au"],
         "country_whitelist": ["in", "de"],
         "domain_whitelist": ["https://mysite.com"],
         "chat_enabled": true
       }
     }'
Parameters
abr: (Boolean) Adaptive Bitrate Streaming. Set tofalseto disable.cloud_recording: (Boolean) Enable cloud recording.embed_password: (String) Password required to embed the stream.country_block: (Array) List of country codes to block.country_whitelist: (Array) List of country codes allowed.domain_whitelist: (Array) List of domains allowed to embed the stream.chat_enabled: (Boolean) Enable embed chat.
Replace {your_authentication} with your actual authentication token. The country codes should be in ISO 3166-1 alpha-2 format.
Updated about 1 year ago
